Sunday, January 4, 2015

Introducing Your Baby to New Fruits and Vegetables

When your baby has mastered the very fine purees and simple flavors most often introduced as the first solid foods, it's time to start incorporating new flavors into your baby's diet. When your baby starts to enjoy more variety, it's time to think outside of the box. Get beyond the typical apples and bananas and offer your baby some different and often overlooked fruits and vegetables that offer up tons of nutrition and plenty of flavor.

Avocados. Avocados are an excellent early food for babies. They have a silky, smooth texture that only requires fork mashing, rather than real pureeing. The mild flavor is very often a hit with babies, and avocados are loaded with the good fat that babies need.

Kiwi. Kiwi also has a naturally soft texture so it is easy to mash to the correct consistency for your baby. While kiwis may be a little sour for your baby at first, they are a wonderful source of vitamin C.

Melons. Melons such as cantaloupe, honeydew, and watermelon are great fruits for your baby to try. Again, they have a naturally soft texture so they are easy to chew. Cantaloupe is packed with vitamins A and C. Honeydew is also a great source of vitamin C and watermelon has lycopene, vitamin C, and vitamin A.

Cherries. Bing cherries, chopped into tiny pieces, are another great fruit for your baby to try. Cherries provide vitamin C and potassium.

Broccoli. Because of the naturally firm texture of broccoli, it is sometimes overlooked as a baby food. Removing the florets and chopping them finely, however, makes broccoli a great vegetable to mix in with another puree such as carrots. Broccoli is a nutritional powerhouse providing vitamin C, fiber, iron, calcium, potassium, and folate. The gassiness that broccoli often gives adults, typically does not translate to babies.

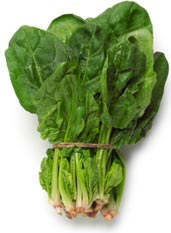
Spinach. Spinach can be pureed alone or mixed with other purees. Because it has a rather strong flavor, your baby may like it better when mixed with something else. Spinach is packed with nutrients including Vitamin A, C, magnesium, folate, and iron.

Summer Squash. Your baby probably already likes butternut or acorn squash, but what about yellow summer squash? This vegetable provides vitamin C and has a mild flavor that many babies love. Just make sure you leave the skin on and chop it very finely.

Corn. Corn too is often overlooked as a vegetable because it is sometimes considered to be a grain. But with vitamin C and fiber, and a naturally sweet taste, corn can be a nice addition to your baby's diet. Be sure your baby is accustomed to chewing before trying smashed corn kernels.

Tomatoes. Tomatoes are acidic so make sure your baby is a little older (8 or 9 months) before incorporating tomatoes into his diet. Chopped tomato makes a great finger food. Tomatoes are full of lycopene, vitamins A and C, and potassium.

When feeding your baby make sure you consider all that your grocery store produce section has to offer, not just the same old fruits and vegetables. Introducing your baby to plenty of new flavors from a young age will help her to be open to new foods for a lifetime, and will give her the ultimate in good nutrition.

Sunday, December 28, 2014

10 foods that cleanse the liver

In the past, I talked about my favorite food cleaning. This list is a bit more specific and mainly focuses on foods that can help cleanse the liver. Besides taking a supplement liver cleansing and applying at least two year clean liver and gallbladder, eat the following foods is the best way to keep your liver healthy and work the way you need. I encourage you to incorporate these foods into your weekly diet liver cleansing.

1. Garlic

Garlic


Only a small amount of this pungent bulb has the ability to activate liver enzymes that help your body eliminate toxins. Garlic also contains large amounts of allicin and selenium, two natural compounds that help cleanse the liver.

2. Grapefruit

Both the top and the antioxidants vitamin C, grapefruit increases the natural processes of cleansing the liver. A freshly squeezed grapefruit juice will help stimulate the production of liver detoxification enzymes that help eliminate carcinogens and other toxins.

3. Beets and carrots


Beets

Both are extremely rich in flavonoids and plant-beta-carotene; eat beets and carrots can help stimulate and improve liver function in general.

4. Green Tea

This magnet is filled liver plant antioxidants known as catechins beverage, a compound known to help liver function. Green tea is not only delicious, it's also a great way to improve your overall diet. Learn more about the benefits of green tea.

5. Leafy vegetables


Leafy Greens

One of our strongest allies cleansing the liver, leafy greens can be eaten raw, cooked or juiced. Extremely rich in chlorophyll in plants, green vacuum environmental toxins from the bloodstream. With its distinctive ability to neutralize heavy metals, pesticides and chemicals, cleaning these foods provide a powerful mechanism to protect the liver.

Try to include green leafy vegetables like bitter gourd, arugula, dandelion leaves, spinach, mustard, chicory and your diet. This will help increase the creation and flow of bile, a substance that eliminates waste of organs and blood.

6. Lawyers

This super rich in nutrients helps the body produce glutathione, a compound that is necessary for the liver to purify harmful toxins.

7. Apples


Apple

Rich in pectin, apple keep the chemicals necessary for the body to cleanse and release toxins from the digestive system. This in turn facilitates the liver to treat toxic load during the cleaning process.

8. Olive oil

Cold pressed organic oils such as olive oil seeds, hemp and flax are perfect for the liver when used in moderation. They help the body lipid core can suck toxins in the body. Thus, some of liver burden is accurate in terms of toxic overload many of us suffer.

9. Alternative grains

Not only do you have alternative grains like quinoa, corn, wheat and their diet is that if you have wheat, wheat flour or other whole grains in your diet, it's time to make changes. The liver is the filter body of toxins, and cereals containing gluten are full of them. A study last year found that people who suffered gluten sensitivity test also had abnormal liver enzymes, and this is just one of many.

10. Lemons and Limes

Lemons and Limes

These citrus fruits contain high amounts of vitamin C, which helps the body to synthesize toxic substances into substances that can be absorbed by the water. Drink freshly squeezed lemon or lime juice in the morning helps stimulate the liver.


Saturday, December 27, 2014

Tapioca Pudding

Tapioca Pudding (photo)

One of my favorite desserts growing up was tapioca pudding. You don’t see it that much anymore. Kids get pre-made over-sugared puddings from the grocery store. My parents don’t make it that often as it requires too much (for them) careful stirring while the tapioca cooks. And you won’t find tapioca on any low-carb diets as it is pure starch, from the same plant as cassava. Yet tapioca pudding is one of those comfort foods that conjures up happy childhood memories. It’s actually really easy to make.

Tapioca Pudding Recipe

  • Yield: Serves 4-6.

Look at the instructions on the package of tapioca that you buy. Some small pearl tapioca requires overnight soaking in water. If your package has that requirement, reduce the milk in the recipe to 2 1/2 cups from 3 cups.

Ingredients

  • 1/2 cup small pearl tapioca (you can usually find it in the baking section of the grocery store, do not use instant tapioca)
  • 3 cups whole milk (or skim milk with cream added)
  • 1/4 teaspoon salt
  • 2 eggs
  • 1/2 cup of sugar
  • 1/2 teaspoon of vanilla

Method

1 Combine tapioca, milk, and salt in 1 1/2 quart pan on medium high heat. Stir until boiling. Simmer 5 minutes, uncovered at the lowest possible heat, adding sugar gradually.

2 Beat eggs in a separate bowl. Mix in some of the hot tapioca very slowly to equalize the temperature of the two mixtures (to avoid curdling).

3 Return eggs to pan with tapioca. Slowly bring mixture barely to a boil, stirring constantly. Reduce heat and stir several minutes at a low simmer, stirring constantly until you get a nice thick pudding consistency. Cool 15 minutes. Add vanilla. Serve either warm or chilled.

Note: If you want to make a more light and fluffy, but still rich, tapioca pudding, separate the eggs. Use the egg yolks to stir in first to the pan with the tapioca. Once the pudding has become nice and thick, beat the egg whites in a separate bowl to soft peaks. Remove the pan of tapioca pudding from the stove, fold in the beaten egg whites into the pudding.

post from sitemap

Strawberry Frozen Yogurt

Strawberry Frozen Yogurt (photo)

When fresh strawberries come into season, and we can get flats of them for only a few dollars, that’s when we start looking for everything and anything to do with them. This strawberry frozen yogurt is a terrific way to take advantage of the abundance of the season. And as the days heat up, it’s a good way to cool down quickly. Although it feels like you’re eating ice cream, this strawberry frozen yogurt is actually much lighter than a typical custard and cream-based ice cream, and it’s filled with the flavor of the fresh strawberries.

Strawberry Frozen Yogurt Recipe

  • Yield: Makes about 1 quart.

Best to eat it on the same day as you make it, as it will get icy if it stays in the freezer for more than 8 hours. If you want it to last longer and not get icy, add a tablespoon of vodka or kirsch to the mixture right before churning.

Ingredients

  • 3 cups sliced fresh strawberries
  • 3 Tbsp lemon juice
  • 2/3 cup to 1 cup sugar (depending on how sweet you want the result, and how sweet your strawberries are to begin with)
  • 1/4 teaspoon salt
  • 1/2 cup whole milk
  • 1 1/2 cups full fat yogurt (if use low or non fat, then add 2 Tbsp cream)

Method

1 Place the strawberries, lemon juice, salt, and sugar in a medium saucepan. Heat on medium heat, stirring, until the sugar has completely dissolved. Use a potato masher to mash up the strawberries as the mixture is heating. As soon as all of the sugar has completely dissolved, remove from heat and let sit for 10 minutes.

2 Stir in the milk and yogurt, until completely incorporated. Place the mixture in the refrigerator, and chill for at least an hour, preferably several hours, until completely cold, before proceeding.

3 Process the mixture in your ice cream maker (Amazon sells a good one) 20 to 25 minutes. Eat immediately or keep in freezer until served.

post from sitemap

Walnut Mocha Torte

Walnut Mocha Torte on Simply Recipes

Happy Valentine’s! Here’s a special treat that would be perfect for the day of hearts: a German-style torte, a layered cake made with ground walnuts, whipped eggs, sugar and breadcrumbs, frosted with a light, mocha flavored whipping cream frosting. The recipe comes from my friend Gabriele, who has been making it as her go-to special occasion cake for her family for 30 years. The cake is almost flourless, having only 1/2 cup of breadcrumbs, and has a lovely texture from the ground walnuts and whipped eggs. To make the mocha frosting, you start with a base of strong coffee (I use decaf and double the amount of coffee I would normally use for drinking), sugar, some cornstarch, and a few chocolate chips. These ingredients are simmered until thick, then cooled and folded in with stiffly whipped cream. The result is a light, creamy frosting with a lovely chocolate coffee mocha flavor.

The original recipe is a clipping that a friend of Gabi’s gave her years ago. I investigated the clipping and found that the recipe was published in a local newspaper in the late 70s as part of a menu celebrating the opening of the John Steinbeck Center in Salinas, California. The original clipping instructions are rather sparse, so I’ve elaborated here to help ensure that you have a successful result if you make the recipe. It’s actually much easier than it looks at first blush, but it does require some baking skill around whipping egg whites and gently folding things together. Think of it like making a sweet soufflé, with ground nuts in the batter. A light touch will be rewarded.

Walnut Mocha Torte Recipe

  • Prep time: 25 minutes
  • Cook time: 1 hour
  • Yield: Makes 12 servings.

To get started on this recipe, the first things you should do are to make the coffee for the frosting and to separate the eggs for the cake batter. Eggs will separate better when they are cold, right out of the refrigerator, but will whip up better if they are at room temp. So separate them first, and then prep the rest of the ingredients.

Ingredients

Cake:

  • 6 eggs
  • 1 cup (200 g) white granulated sugar (divided into 3/4 cup and 1/4 cup)
  • 1 cup (120 g) finely ground walnuts (from about 1 1/3 cup of shelled walnuts)
  • 1/2 cup (55 g) fine dry bread crumbs (plain, unseasoned)

Mocha Topping:

  • 1/2 cup (100 g) white granulated sugar
  • 2 Tbsp corn starch
  • 1 cup (8 fluid ounces, 236 ml) strong coffee (I use decaf, with twice the amount of coffee for the liquid as I would usually use to drink)
  • 1 ounce (30 g) of chocolate chips (a little less than 1/4 of a cup)
  • 1 Tbsp butter
  • 2 teaspoons vanilla extract
  • 1 cup (8 fluid ounces, 236 ml) heavy whipping cream

Method

1 Separate the eggs, into yolks and whites (see How to Separate Eggs).  Take care to make sure there are no pieces of shell or egg yolk in the whites, and that the bowl you are using to contain them is completely clean with no residue of fat. Any fat from yolks or oil will make it difficult to beat the egg whites.

2 Prepare two 9-inch cake pans. Line the pans with parchment paper or wax paper. Lightly butter the sides of the pans (not the paper).

3 Preheat oven to 350°F (175°C). Mix together the ground walnuts and the bread crumbs in a small bowl and set aside.

walnut-mocha-torte-1 walnut-mocha-torte-2

Place the egg yolks into a mixing bowl and beat until smooth. Slowly add  3/4 cup of white sugar and continue to beat the egg yolks until thick and pale. (I use a hand mixer for this.)

walnut-mocha-torte-3 walnut-mocha-torte-4

5 Using a stand mixer, beat the egg whites with the whisk attachment until foamy.  Slowly drizzle in 1/4 cup of white sugar, and beat until soft peaks form.

walnut-mocha-torte-5 walnut-mocha-torte-6

6 With a rubber spatula, gently fold the egg whites into the yolk mixture, alternately with the walnut mixture.

walnut-mocha-torte-11

7 Spoon the batter into the prepared, parchment-layered cake pans. Bake for 25 to 30 minutes at 350°F (175°C) until a slight imprint remains when touched.

walnut-mocha-torte-7 walnut-mocha-torte-8walnut-mocha-torte-9 walnut-mocha-torte-10

8 While the cake is cooking prepare the mocha frosting base. Place 1/2 cup of white sugar and 2 tablespoons of cornstarch into a saucepan. Turn the heat onto medium and gradually stir in the coffee and the chocolate chips.  Stir continuously until the mixture starts to simmer and thicken quite substantially. Continue to stir while the mixture simmers for 1 minute. Then remove from heat and stir in the butter and vanilla extract until well blended.  Let cool completely. (You will incorporate this mocha base into whipped cream when you frost the cake.)

walnut-mocha-torte-12 walnut-mocha-torte-13

9 Remove the cakes from oven and cool in the pans for 10 minutes. Run a dull knife around the edges of the cakes to separate it from the sides of the pans. Carefully invert the cakes onto a rack. Carefully peel back and discard the parchment or wax paper. Let cool completely.  Note that if you want to make ahead, you can cook the cakes first, let cool to room temp, wrap with plastic wrap, and freeze until you are ready to frost and serve.

walnut-mocha-torte-14 walnut-mocha-torte-15

10 Complete the frosting. Whip the cream until it is rather thick, just before that point to which if you kept on whipping it would turn to butter. This will help it hold up as a frosting. Once whipped, fold the whipped cream and mocha base together. It may be a little speckled, and if you fold it only lightly, you can have almost a marbling effect of light and dark with the frosting, if you wish.  Place one cake on a serving platter. Frost the top. Place the second cake on top of it, and frost the top and sides of the cake.  Serve immediately, or keep chilled until serving.

post from sitemap

Perfect Cheesecake

perfect-cheesecake-vertical-600

It takes a bit of hubris to describe a recipe as “perfect”, especially for a recipe such as cheesecake, for which so many have their own personal favorite. But, this is simply the best, most wonderful cheesecake I have ever had, and have ever made. It is based on a master recipe, from the master of baking herself, Dorie Greenspan.

We first posted this recipe several years ago and it has become one of the most popular recipes on the site. Many thanks to Dorie for allowing us to present it here! It is a classic New York style cheesecake with a graham cracker crust and high sides. It is dense, rich, and light at the same time, and serves a small army. But watch out—just when you think you’ve made enough for your gathering, so many people will go back for seconds that you may be left without a piece!

I was first inspired to make this cake by my young friend Audrey (now in college, we’ve been cooking together since she was 9). We’ve made it together twice and more times than we can count on our own. Audrey has made some slight changes to Dorie’s base recipe. She’s thickened the graham crust on the bottom and doesn’t let it ride up the sides. She also tops the cake with a creamy sour cream topping and serves it with a tangy bright raspberry sauce.

Perfect Cheesecake

This is Audrey’s favorite cake, and I’ve asked her to share a few words about it. Please welcome Audrey:

The most loved, read, worn and tattered page in my Dorrie Greenspan book Baking: From My Home to Yours is page 234, the cheesecake page. I first came across this recipe Christmas day two years ago, when Elise gave me Dorie’s book. This recipe, without a doubt, makes the best cheesecake in the world. It is a perfect combination of tangy and sweet, with a velvety smooth and rich texture, which is wonderful for entertaining, but can be detrimental to waistlines. To the delight of my family I make this recipe for every special occasion, with consistently excellent results. ~Audrey

From the recipe archive, first posted 2011.

Perfect Cheesecake Recipe

  • Cook time: 3 hours
  • Yield: Makes 16 servings

Ingredients

Crust

  • 2 cups (475 ml) of Graham cracker crumbs (from a little less than 2 packages Graham crackers
  • 2 Tbsp sugar
  • Pinch salt
  • 5 Tbsp (70 g) unsalted butter (if using salted butter, omit the pinch of salt), melted

Filling

  • 2 pounds cream cheese (900 g), room temperature
  • 1 1/3 cup granulated sugar (270 g)
  • Pinch of salt
  • 2 teaspoons vanilla
  • 4 large eggs
  • 2/3 cup sour cream (160 ml)
  • 2/3 cup heavy whipping cream (160 ml)

Toppings

  • 2 cups sour cream (475 ml)
  • 1/3 cup powdered sugar (35 g)
  • 1 teaspoon vanilla
  • 12 ounces (340 g) fresh raspberries
  • 1/2 cup granulated sugar (100 g)
  • 1/2 cup water (120 ml)

Special equipment needed

  • 9-inch, 2 3/4-inch high springform pan
  • Heavy-duty, 18-inch wide aluminum foil
  • A large, high-sided roasting pan

Method

Prepare the crust

place springform pan on foil wrap first layer of foil around pan

wrap second layer of foil around pan finish wrapping foil

1 Prepare the springform pan so that no water leaks into it while cooking.* Place a large 18-inch by 18-inch square of aluminum foil on a flat surface. Place the springform pan in the middle of the foil. Gently fold up the sides of the foil around the pan. Make sure to do this gently so that you don't create any holes in the foil. If there are any holes, water will get into the pan and ruin the crust. Press the foil around the edges of the pan. Place a second large square of foil underneath the pan, and repeat, gently folding up the sides of the foil around the pan and pressing the foil against the pan. Gently crimp the top of the foil sheets around the top edge of the pan.

2 Preheat oven to 350°F, with rack in lower third of oven. Pulse the graham crackers in a food processor or blender until finely ground. Put in a large bowl, and stir in the sugar and salt. Use your (clean) hands to stir in the melted butter.

use your hands to press down graham cracker crumbs form even layer of graham cracker crumbs

3 Put all but 1/4 cup of the graham cracker crumbs in the bottom of the springform pan. (Save the remaining 1/4 cup for if you happen to have any holes that need to be filled in, either while you are making the crust, or after the cake has cooked and you've unmolded it.) Gently press down on the crumbs using your fingers, until the crumbs are a nice even layer at the bottom of the pan, with maybe just a slight rise along the inside edges of the pan. Be careful as you do this, as not to tear the aluminum foil. Place in the oven for 10 minutes. Remove from the oven and let cool. Reduce the oven temperature to 325°F.

Make the filling

place cream cheese in mixer beat until smooth

4 Cut the cream cheese into chunks and place in the bowl of an electric mixer, with the paddle attachment. Mix on medium speed for 4 minutes until smooth, soft and creamy. Add the sugar, beat for 4 minutes more. Add the salt and vanilla, beating after each addition. Add the eggs, one at a time, beating for one minute after each addition. Add the sour cream, beat until incorporated. Add the heavy cream, beat until incorporated. Remember to scrape down the sides of the mixer bowl, and scrape up any thicker bits of cream cheese that have stuck to the bottom of the mixer that paddle attachment has failed to incorporate.

Cook the cheesecake

place pan in high sided roasting pan pour cheesecake filling into pan

place pan on roasting rack in oven pour hot water into roasting pan to create a water bath for the cheesecake

5 Place the foil-wrapped springform pan in a large, high-sided roasting pan. Prepare 2 quarts of boiling water. Pour the cream cheese filling into the springform pan, over the graham cracker bottom layer. Smooth the top with a rubber spatula. Place the roasting pan with the springform pan in it, in the oven, on the lower rack. Carefully pour the hot water into the roasting pan (without touching the hot oven), to create a water bath for the cheesecake, pouring until the water reaches halfway up the side of the springform pan, about 1 1/4 inches. (Alternatively you can add the water before putting the pan in the oven, whichever is easier for you.) Cook at 325°F for 1 1/2 hours.

6 Turn off the heat of the oven. Crack open the oven door 1-inch, and let the cake cool in the oven, as the oven cools, for another hour. This gentle cooling will help prevent the cheesecake surface from cracking.

7 Cover the top of the cheesecake with foil, so that it doesn't actually touch the cheesecake. Chill in the refrigerator for a minimum of 4 hours, or overnight.

Prepare sour cream topping

8 Place sour cream in a medium sized bowl, stir in the powdered sugar and vanilla, until smooth. Chill until you are ready to serve the cake.

Note that this recipe produces enough sour cream topping for a thick topping and some extra to spoon over individual pieces of cheesecake, if desired. If you would like a thinner layer of topping and no extra, reduce the sour cream topping ingredients in half.

Prepare the raspberry sauce

crush raspberries and sugar in small saucepan heat and whisk raspberries

9 Place raspberries, sugar, and water in a small saucepan. Use a potato masher to mash the raspberries. Heat on medium, whisking, about 5 minutes, until the sauce begins to thicken. Remove from heat. Let cool.

Prepare the cake to serve

run blunt knife around edge of pan to separate cheesecake from pan remove springform pan from cheesecake

spread top of cheesecake with sour cream cheesecake is ready to serve

10 Remove the cake from the refrigerator. Remove the foil from the sides of the pan, and place the cake on your cake serving dish. Run the side of a blunt knife between the edge of the cake and the pan. Dorie recommends, and we've done with success, that you use a hair dryer to heat the sides of the pan to make it easier to remove. Open the springform latch and gently open the pan and lift up the sides. Spread the top with the sour cream mixture. Serve plain or drizzled with raspberry sauce.

post from sitemap

Strawberry Nectarine Fruit Salad

Strawberry Nectarine Fruit Salad

Every summer gathering should include a fruit salad, don’t you think? Nectarines and peaches are in season right now and when I saw some beautiful white nectarines at the market I couldn’t resist. We used to have a white nectarine tree whose fruit you had to eat leaning over the sink they were so juicy. Grocery store-bought nectarines are much firmer than the ones we used to grow, but that firmness just helps them hold up better in a fruit salad like this.

My favorite way to make any fruit salad, including this nectarine strawberry version, is to toss the fruit with honey, a little lemon juice, and some thinly sliced fresh mint from the garden. The honey helps the fruit macerate and extract some of their juices, the lemon juice contributes a little tang, and the mint? The mint plays well with them all.

I made this salad a few days ago to cap a lunch I prepared for my friends Lisa and Jenny, who insisted that I put it on the blog. So here you go girls! The recipe is shown to serve four, but you could easily scale it up for a Labor Day gathering crowd.

Strawberry Nectarine Fruit Salad Recipe

  • Prep time: 10 minutes
  • Yield: Serves 4

The proportions are flexible, depending on the sweetness of your fruit and what you have on hand. We used about a 2:1 ratio of nectarine chunks to strawberries.

The amounts given are for four servings. You can easily scale up this recipe to feed a crowd!

Ingredients

  • 2 to 3 large white nectarines (3/4 pound to a pound), cut into edible sized chunks, pit and stem removed
  • About 8 to 10 fresh strawberries, stems removed, quartered
  • 1 Tbsp honey
  • 1 teaspoon lemon juice
  • 4 leaves fresh mint, thinly sliced

Method

Gently toss the chopped nectarines and strawberries together in a medium bowl with the honey and lemon juice. Let sit for 15-20 minutes, so that the fruit has a chance to macerate.

Right before serving, gently toss with thinly sliced fresh mint.

Taste for tartness. If too tart for your taste, sprinkle a little sugar over it. If cloyingly sweet, sprinkle with a little more lemon juice. The level of sweetness or tartness will depend on the specific fruit you are using, so you will need to make adjustments depending on your fruit.

post from sitemap